Category: Order Entry
Increasing Revenue in Your Coffee Shop
I’m always amazed by some of the techniques that our customers use to help increase revenue.
1) Sampling – It’s amazing how effective sampling can help drive sales of a specific (hopefully high profit) item. To do it right you have to track it. Before you sample an item, run a report for that specific menu item for the last month. That will tell you how often it is ordered. Divide that number by the amount of days in the month and you have an average order per day on that item. Now start the sampling of that item. After sampling for a few days, run that same report for the month after the sampling – did the numbers change? If so, continue to push it! If not, move on to a different item and then evaluate if you need to keep that item on the menu at all. Either way, you are learning more about what your customer s want.
2) Advertise – Three ways to easily do this with SP-1. First, create a coupon at the bottom of the ticket that you can hand out. Even if you don’t usually provide a receipt, this can be something that you do every once in a while and then hand out to customers. Second, use our forced modifiers to help your employees effectively push that item. Lastly, and this might require you to spend a little money, setup our order confirmation monitor and use the slide show to entice customers at the point of purchase.
Give a couple of these methods a try and let us know what works for you.
Posted in Order Entry, POS Features, Uncategorized
Pinpoint Your Customers With Customer Codes!
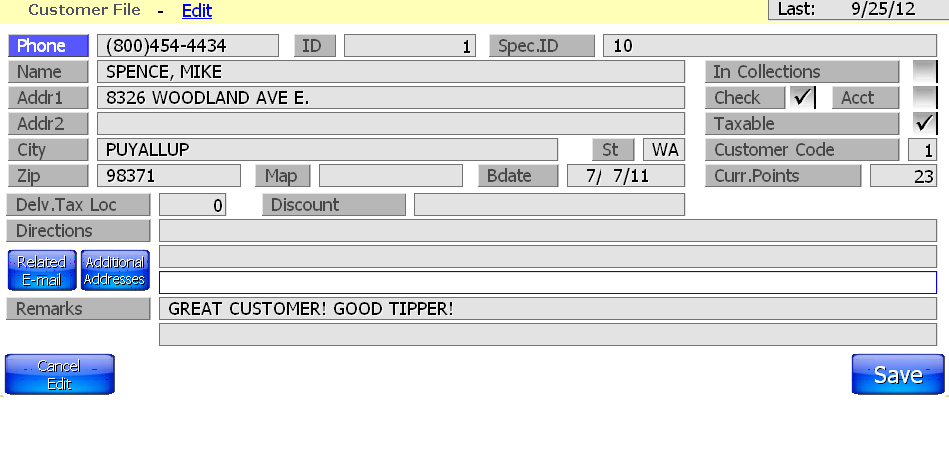 Here is a great feature you might not be aware of! Customer Codes. The customer code field in the customer file can be used to distinguish groups of customer. For instance, you can use code 1 for business customers, 2 for wholesale customers and so on. With our customer export files, you can then run use tools like excel to sort and market specifically to those groups.
Posted in Order Entry Tagged with: customer code.
Ordering Multiple Items? Easy!
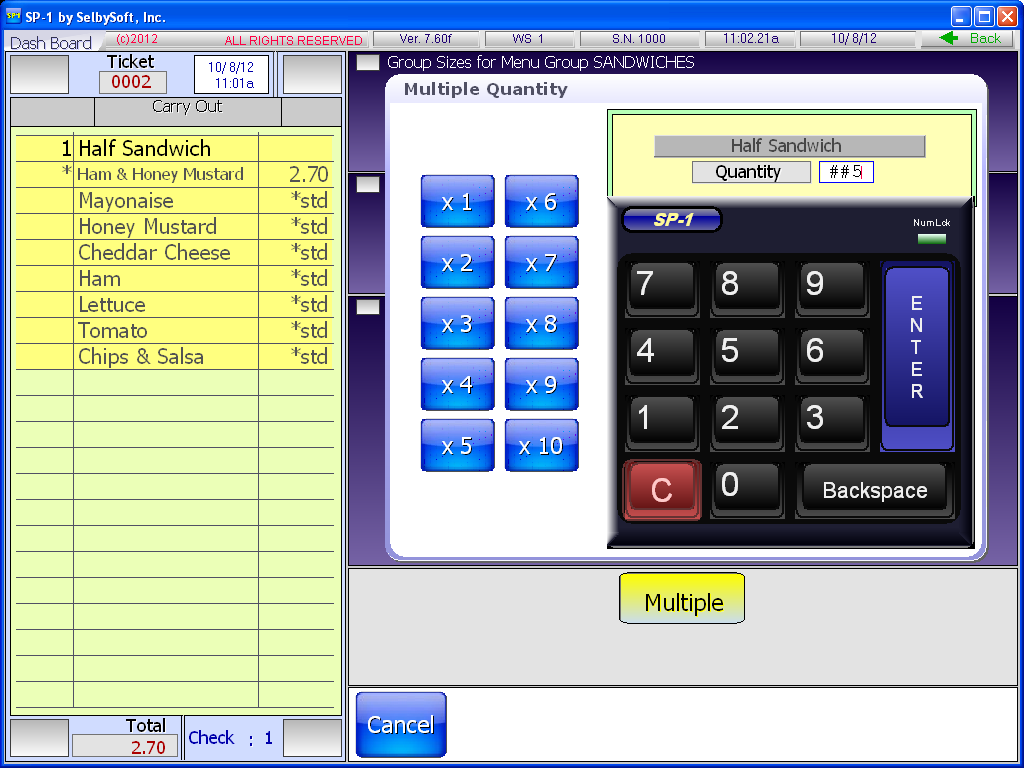
Have you ever wanted t0 quickly ring up multiples of the same item? SP-1 makes it easy. Simply select the MULTIPLE button and enter the quantity or select the quick buttons!
Posted in Order Entry, POS Features Tagged with: Multiple
Reprinting Tickets? Easy!
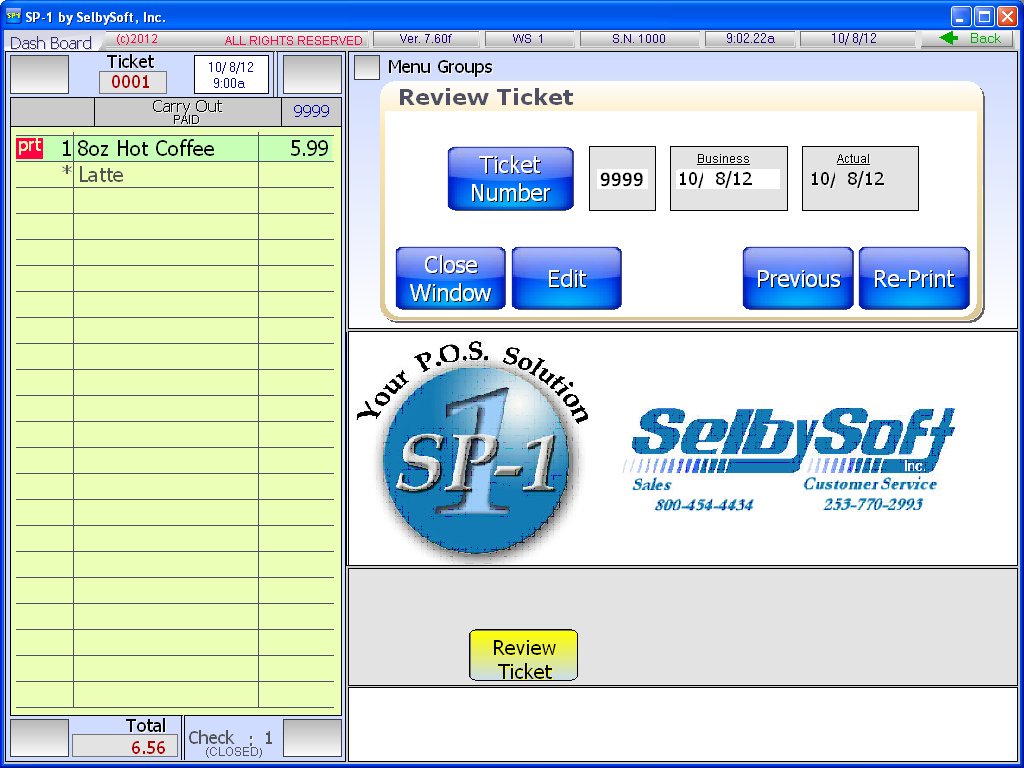
If you are like a lot of our customers, you probably don’t always print a receipt for your customers. However, there is always that one situation where you have to print a receipt for someone after the fact. Fortunately, it’s simple with SP-1! Simply select the REVIEW TICKET button in Order Entry and you will see the screen below. If you don’t know the ticket number, you can always enter 9999 to bring up the last ticket number.
From there you can select the RE-PRINT button and choose to re-print the ticket and, if you have remote printers, the kitchen or barista ticket. If you are printing a remote kitchen or barista ticket, SP-1 will print a header indicating that it is a re-print so they don’t accidentally remake the order!
Posted in Order Entry, POS Features Tagged with: receipts, reprint
1/2 & 1/2, 1/4’s and 1/3’s! Portion Setup for Pizza!
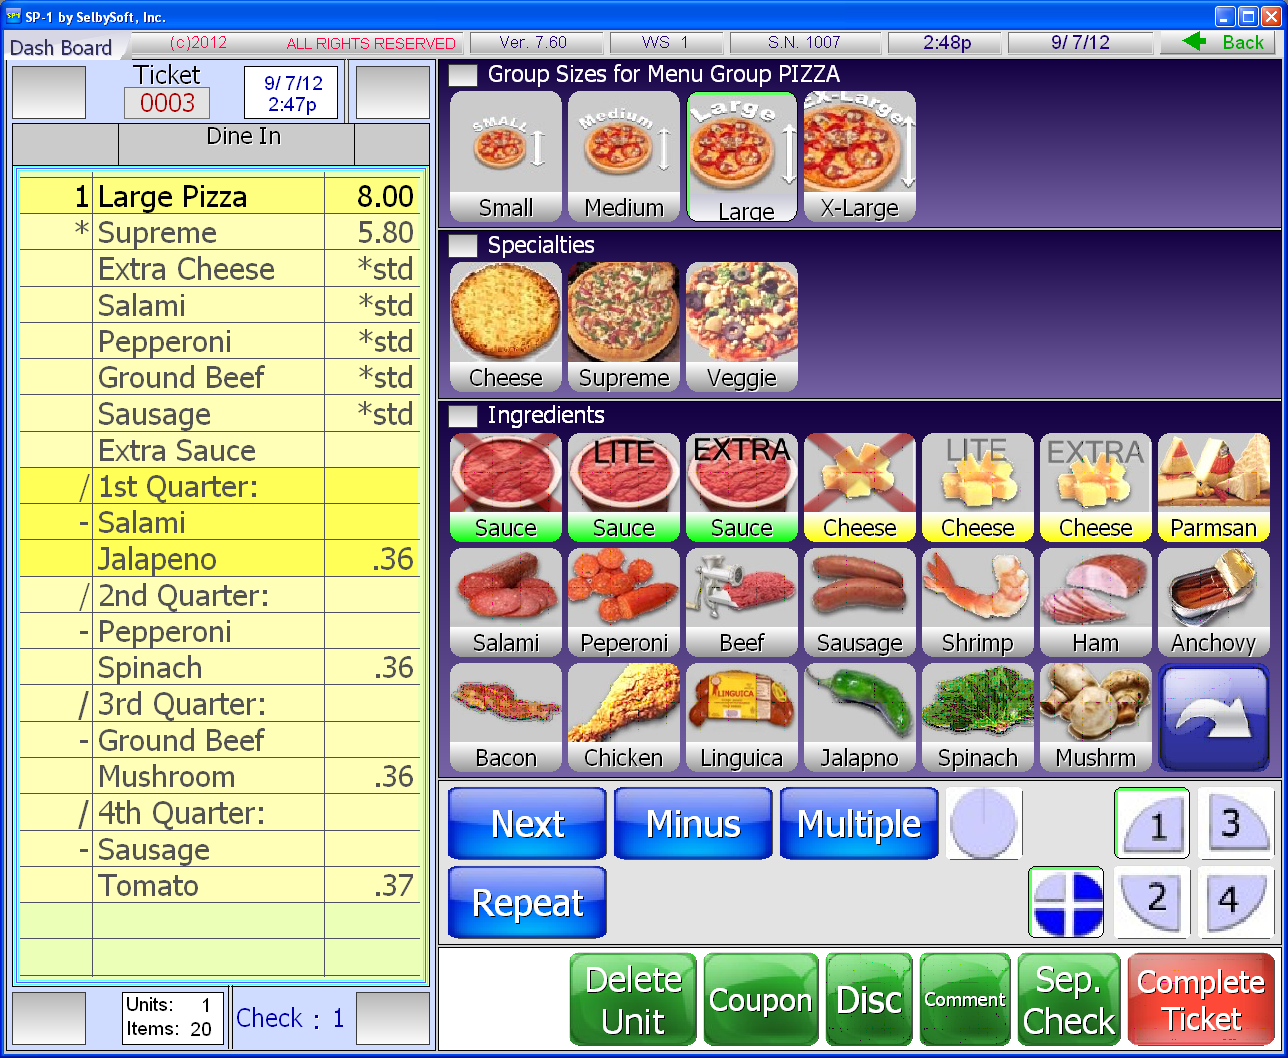
Do you sell pizza? If so you have probably run into 1/2 & 1/2 pizza situations. SP-1 supports that and more. We support 1/2 & 1/2 as well as 1/4 and 1/3 pizzas (if you wish!).
Below is a screen shot showing a large supreme pizza. This pizza has extra sauce on the whole pizza.
We have taken salami OFF the first quarter and ADDED jalapeno to the first quarter. You can see the other three quarters as well.
Posted in Delivery, Order Entry Tagged with: pizza, quarters, thirds
Menu Changes & SP-1
Your menu will change. It’s something that every store goes through. Some customers are not aware of what their options are on this however.
- Make the changes yourself. No problem. If you have a simple change or just want to be in total control of the menu, you can make all your own menu changes.
- Work with us simultaneously. If you are on a support plan, you can call one of our Customer Service Representatives and have them walk you through any menu changes you need. This is a great way to learn more about the menu system or even to just get a refresher.
- Have a large menu change to do? Let us do it for you. In most cases those changes are completely free while on a support plan.
Posted in Order Entry Tagged with: menu changes
Remote Printing In SP-1
We think a lot about how our customers use our Point Of Sale system. Printing is one of those areas that we really tried to make sure we covered all the bases. Printing to remote printers is incredibly helpful if you have a Barista in that is 5-10 feet down the counter or if you have a separate kitchen area.
SP-1 has the ability to support multiple types of remote printers or displays for your Kitchen, Barista or Delivery staff. It starts with the flexibility of the SP-1 program itself. SP-1 has been designed to be able to specify when and where items are printed or displayed. This can be designated by the specific menu items as well by including by any of the following:
Menu Groups (Coffee, Sandwich, Pizza)
Group Sizes (small, medium, large)
Specialties (Mocha, Latte, Garden Sandwich)
This means that you can specify that the Coffee goes to the Barista and the Sandwich goes to the Kitchen printer or monitor.
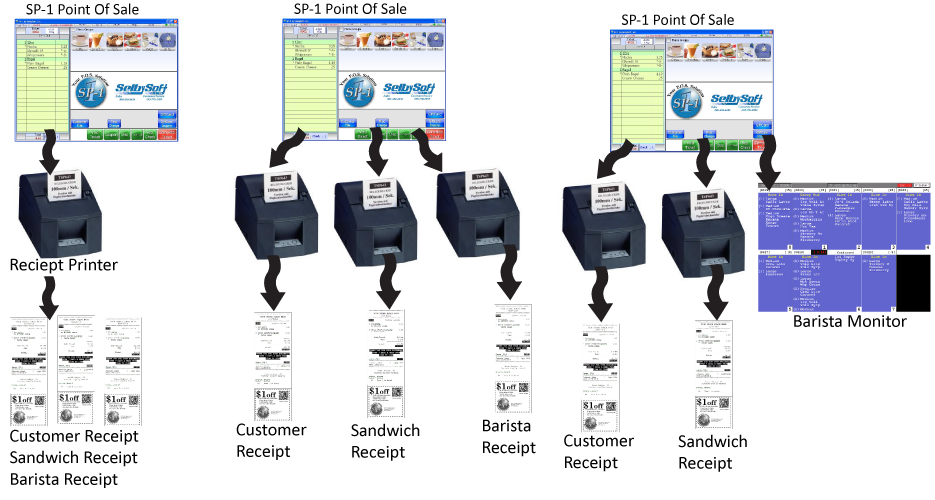
In addition, we can also specify that any of the printers print multiple receipts. Here are a couple of examples:
Single Station with one printer: You can print a receipt, Barista ticket and kitchen ticket from the same printer.
Single Station with three printers: You can print a receipt at the counter, Barista ticket at the espresso machine and sandwich receipt in the kitchen.
Additionally, SelbySoft offers other printing options:
Printers with red/black ink for highlighting (useful for kitchens).
Thermal Printers with logo printing and coupon printing directly on the receipt.
Sticky thermal paper that will stick right to a cup.
Boxlabel printers for sandwich bags.
Finally, the option of forgoing a printer for the kitchen or barista and use a monitor with a bump bar instead. This system will allow you to see up to ten orders on the screen at a time! This screen can also be setup to only show certain menu items just like the printers. These are a great tool in high volume locations.
http://www.youtube.com/watch?v=4ihtGU8GPkI&feature=g-upl
Posted in Hardware, Order Entry, POS Features Tagged with: barista monitors, kitchen monitors, printing, Remote printing
System Security in SP-1
Security is important. I think we all agree about that! The question is how to best set it up?
First, we have to talk about how security levels in SP-1 work to begin with. SP-1 supports eleven different levels for employees. Each employee is assigned a number that represents what their minimum security level is. So, if you assign an employee level 3, they can do anything that requires a 0,1,2 or 3 level password.
The first security level is actually blank – If an employee has no security level number in their file then they can only clock in and out. This allows you to use that security for bakers, prep personnel etc. This security level has no access to any other function of the software.
The others are 0 through 9. Below are some suggestions as to what levels should be used for.
Level 3 – We recommend that this be used for shift supervisors or assistant managers.
Level 5 – We recommend that this be used for an in the store manager level.
Level 7 – Recommended level for any area or district managers when using multiple locations.
Level 9 – Owner level security.
Using this as a template give you the ability to still have areas for growth!
Posted in Employees, Order Entry, theft Tagged with: security
SP-1 POS Dashboard
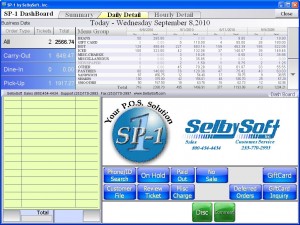
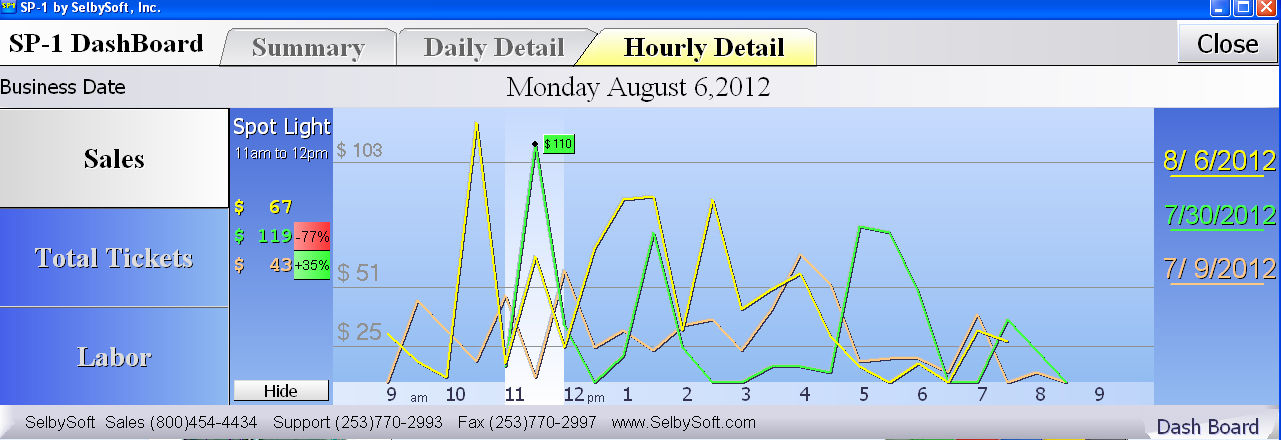
Are you aware of the Dashboard feature in SP-1? This is a great tool to help you quickly see where you are at during the day. There are four components to the dashboard system in SP-1.
1) Dashboard Main Screen: This screen shows you all the quick information about your business. Total sales, voids etc.

2) Daily Detail – This tab shows you menu group sales compared to last week, last month and last year. It’s a great way to see if you are doing better than the past.
3) Graphing. With the hourly detail tab, you can see today vrs last week, last month and last year. This tab also can show you that same information by total tickets!
4) Highlights. If you select an our with your finger or mouse, Sp-1 will compare that hour to the same hour last week, last month and last year!
Posted in Order Entry, POS Features, Reporting Tagged with: dashboard
Credit Card Setup
One of our Customer Service guys recently took a call from someone that was asking about some specifics in the way our Credit Card system is setup. That sounded like a good blog topic!
SP-1 allows for some customization on the credit card side of things. Here are some of the most common items that we can customize.
- Credit Card Printing Threshold: This allows you to specify at what point you don’t automatically print a credit card receipt. For instance, if you set this to $20.00, credit card receipts will only automatically print if the ticket is over $20.00! Of course, you can manually print a slip if someone requests it.
- Number of Receipts to Print: Setting this to 2 will provide two separate receipts for your customer.
- Print Employee: You can choose to print the employees name, ID code or both on the receipt.
- Tip Description: Want to have the tip line print “gratuity”? Enter that here.
- Print Customer Name: If you have a name or a customer account attached to the ticket, then you can choose to print this on the receipt.
- Print Voids: Selecting this will allow you to force a voided credit card slip to print.
- Tip Guideline: You can choose to print a suggested tip amount. You have two areas to fill a suggested percentage in. For example, if you put 10 and 20, then SP-1 will calculate the dollar amount of the tip based on 10% and 20%.
- Header: Enter in what you want printed on the top of the credit card receipt.
- Agreement: Enter in what you want printed on the bottom of the credit card receipt.
Posted in Order Entry Tagged with: credit cards, options, printing
